Good Files Make the Magic Happen - Adding Tabs to Text to Avoid Dropbox
Sometimes when you’re making projects, you’ll have text that’s cut out from another shape. If your project includes this, you’ll want to add tabs to avoid having the inside of your letters drop out.
To get started, you’ll want to create your text and outline it. If you’re not sure how to do that, you can check out our blog post about outlining text here. Ungroup your text. To do this, select your text and then go to object - ungroup [command, shift, G].
The size of your tabs is dependent on the size of your piece. I wouldn’t recommend going much smaller than .125” for your tabs, as anything much smaller than this is too weak to support most materials (however, this might work for paper or chipboard, as the tab doesn’t have to hold much weight).
My tabs are .125” tall and .3” wide. The width of your tabs isn’t too important, you’ll just want to make sure that it’s longer than the section of the letter that you’re adding the tab to.
To add a rectangle shape to your artboard, select the rectangle tool. Then left click anywhere on your artboard and a rectangle menu will pop up. Here you can add the dimensions of your tab, then select OK.


You’ll want to switch back over to the black selection arrow and then select your new rectangle and copy it. Then move your rectangle to your first letter that needs a tab. Letters that don’t have an interior area, such as an C or an E, don’t need tabs. Letters that do have an interior area, such as an A, B or O, do need tabs to avoid dropout. You might decide you like the way your text will look without the interior of your letters, like the example below.

I place all of my tabs first. You’ll just want to paste your rectangle and place, until you’ve added tabs for every letter that has an interior. I then select all tabs for letters that just have 1 tab -for example, in my top row of text, I’ve selected the tabs for ADD and A (I did NOT select the tabs for the B because it has two tabs) and then open the align window. You might have the align window already open in your workspace. If you don’t, click on window - align, and the align tool bar will pop up. With all of the single tabs selected, click on the vertical align center tool. Do this for all tabs that you want to line up.


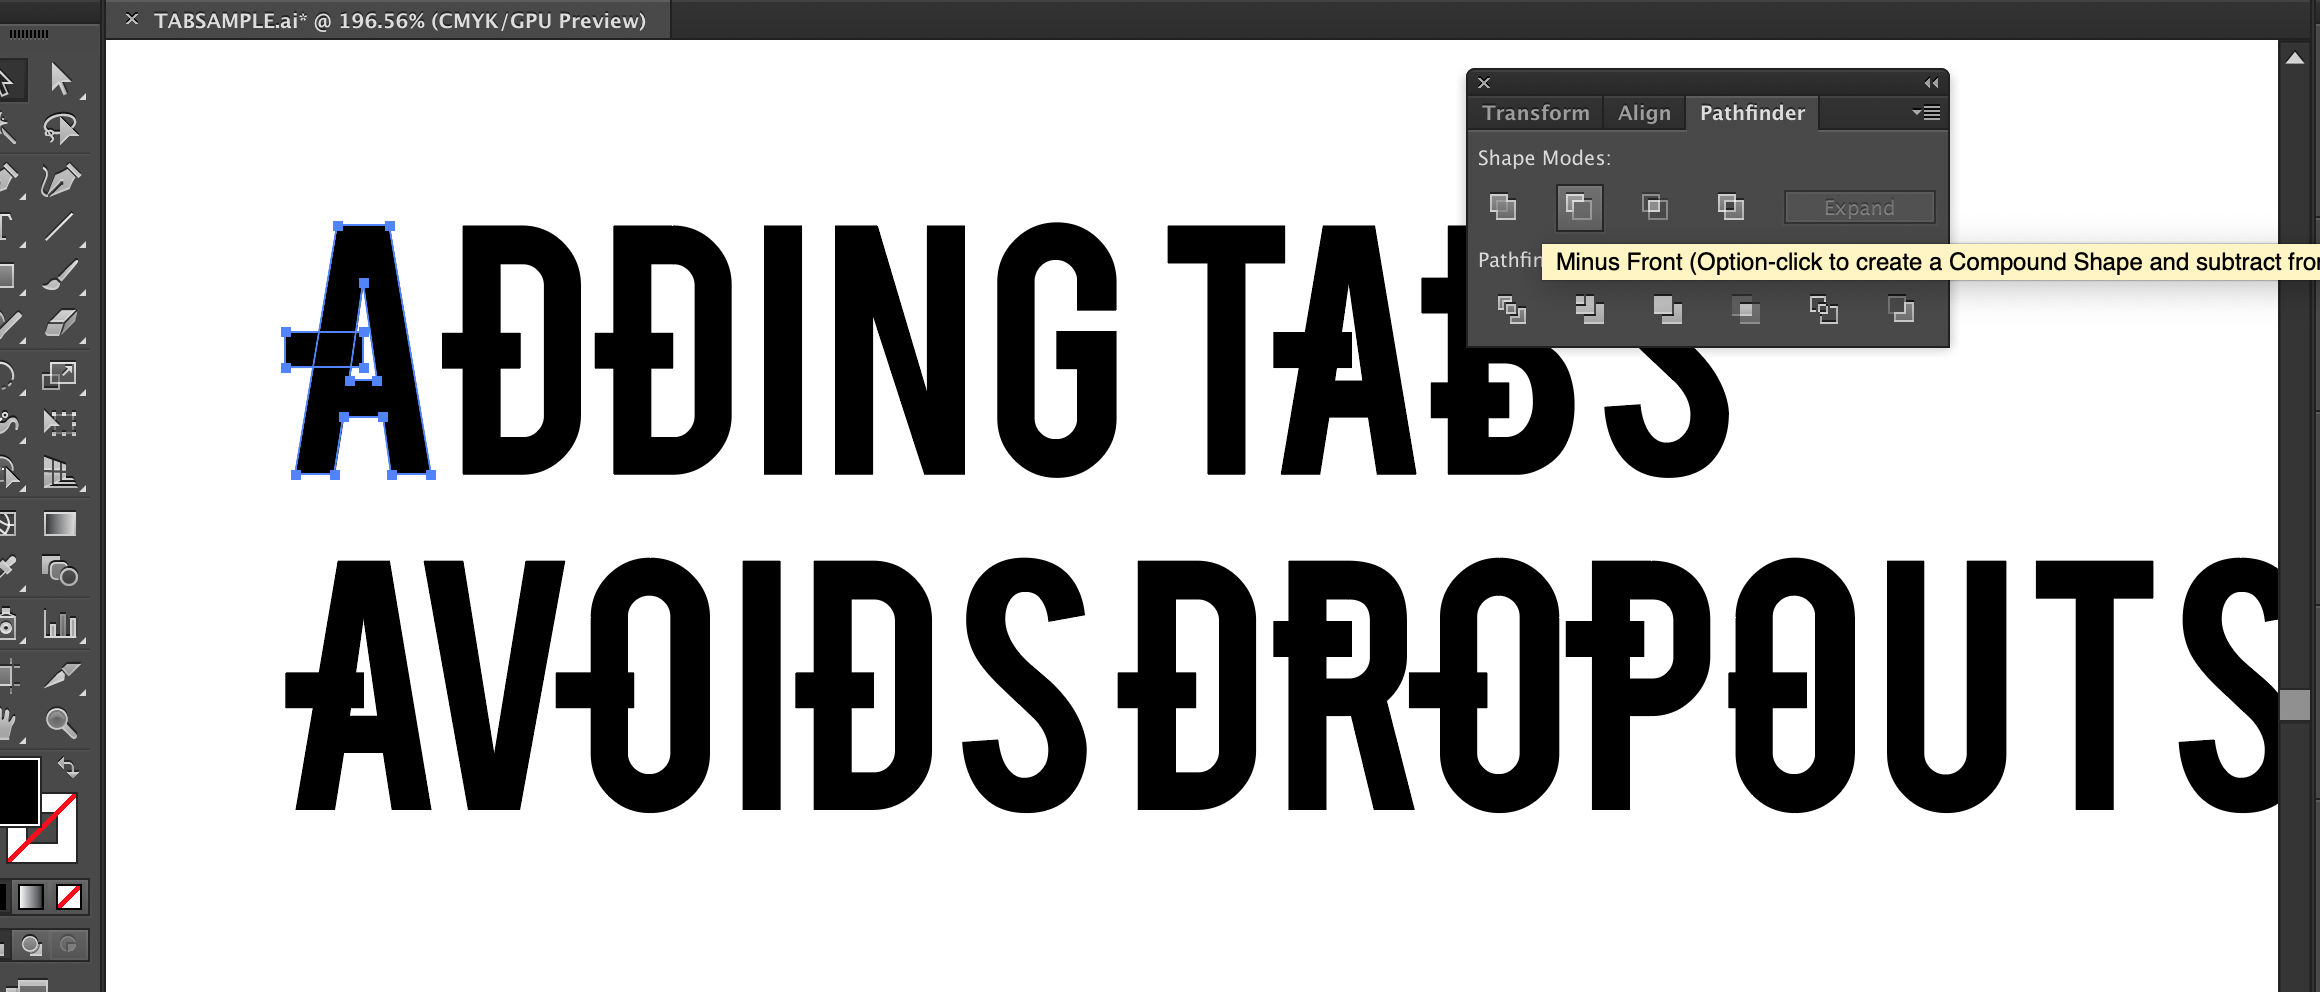
Next, open the pathfinder tool. You might already have this open in your workspace. Otherwise select window - pathfinder. Then select your first letter, as well as the tab. You’ll use the minus front pathfinder tool to “subtract” the tab from the letter. Repeat this for each letter. If your letter has two tabs, like the B, you can select both tabs and the letter at the same time.
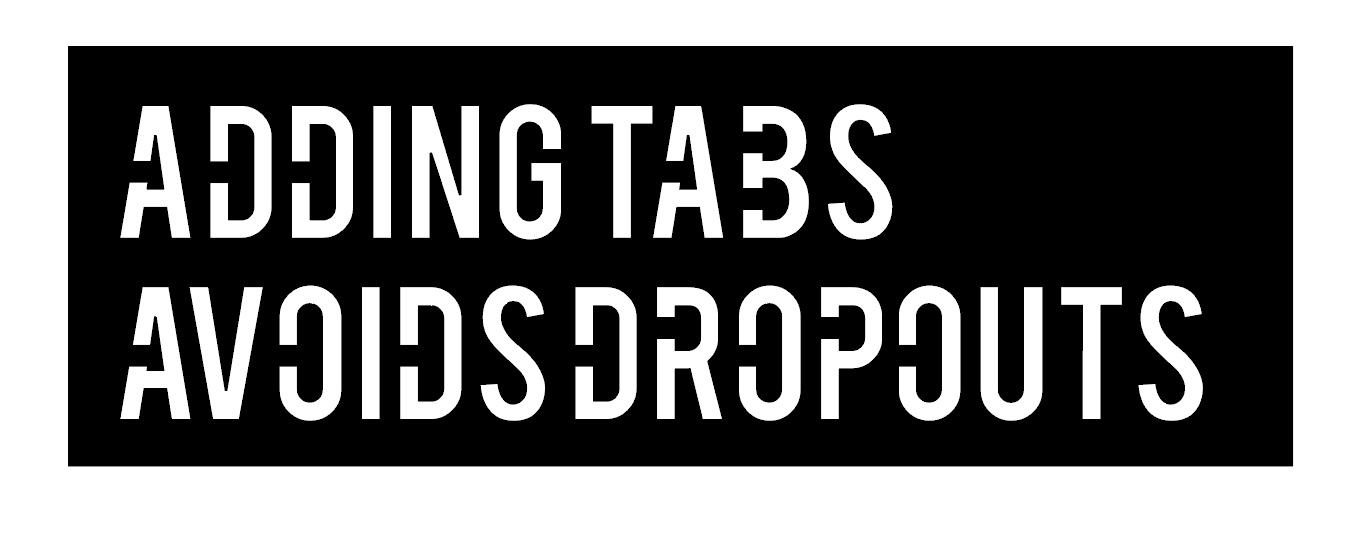
You’ve now added tabs to your letters! Your final piece will now cut and include the interior of the letter, like the example below. I’ve inverted the colors on the example to portray how it will look when the letter are cut out.